Getting started with Swift on AWS Lambda
This tutorial shall help you to get started with our new shiny toy swift-aws-lambda-runtime. It’s a beginners’ tutorial focused primarily on the AWS console, since it is the easiest way to get up and running. Further the Lambda we create here is very simple for the purpose of concentrating on project setup and deployment.
You can find the complete code on GitHub.
If you have any questions or recommendations, please contact me on twitter or open an issue on GitHub so that you can get your question answered and this tutorial can be improved.
Note: The following instructions were recorded on June 1, 2020 and the GUI may have changed since then. Feel free to contact me on twitter if you see a different one.
Step 1: Prerequisites
For this tutorial you’ll need a couple of things.
- This tutorial assumes you use macOS, since this is what most Swift developers work on.
- To compile your Lambda you will need to have Docker installed. This tutorial will not go into much detail what Docker is and what it does. But let’s say so much: With Docker you can set up Linux in a scripted way and execute commands without going through the hassle of having to set up a whole Linux VM or machine manually. The Docker installation itself is very quick, you run through a quick package installer and you’re done, no configuration required. Apart from the few clicks in the Docker installer, this tutorial contains all the commands you will have to type to interact with Docker.
- To actually run your Lambda on AWS you will need to have an Amazon Web Service account.
- You should be a little familiar with the terminal/console.
Step 2: Create and Setup the Swift Package
Create a new Swift Package Manager project. For simplicity reasons we will focus solely on squaring numbers with our Lambda function.
- Start in your development folder and create a directory for your Lambda.
$ mkdir SquareNumber - Open the folder
$ cd SquareNumber - Create a new Swift project with the Swift Package Manager
$ swift package init --type executable - Open the folder in Finder
$ open . - Double click the
Package.swiftwhich will open Xcode. If you are an iOS developer, you might wonder what aPackage.swiftis. In simple terms yourPackage.swiftdefines the dependencies your code has and what products (libraries and/or executables) your code offers. - Let’s change your
Package.swiftto this. We’ll go over what everything means in more detail in just a second.// swift-tools-version:5.2 // The swift-tools-version declares the minimum version of Swift required to build this package. import PackageDescription let package = Package( name: "SquareNumber", products: [ .executable(name: "SquareNumber", targets: ["SquareNumber"]), ], dependencies: [ .package(url: "https://github.com/swift-server/swift-aws-lambda-runtime.git", .upToNextMajor(from:"0.3.0")), ], targets: [ .target( name: "SquareNumber", dependencies: [ .product(name: "AWSLambdaRuntime", package: "swift-aws-lambda-runtime"), ] ), ] )name: "SquareNumber"gives your package a name. This only matters a lot if you want to build a library that is used by other Swift packages.platformsdefines on which Apple platforms the code can be executed. Since Lambdas are supposed to be run on Linux servers with Amazon Linux, it is reasonable to make them run only on macOS for debugging. Running Lambdas on iOS, tvOS or even watchOS doesn’t lead anywhere meaningful.In the
dependenciessection you can see what external libraries your code depends on. To run code within AWS Lambda you’ll need a runtime that handles the communication with the Lambda Runtime Interface. This is what theAWSLambdaRuntimeis for. You import it by specifing its GitHub url.In the
targetssection you specify your own targets. They are pretty comparable to targets you specify within an Xcode project (that’s probably why they share the name 😎). In our example we only want to create an executable that is calledSquareNumber. An executable must have amain.swiftfile that is the starting point of execution. To advertise our executabletargetas a product of our package, we add it to theproductssection.⚠️ NOTE: executable targets cannot be used in a
testTarget! Testing is a little more complicated, which is why I’ll explain it in another tutorial.If this is your first time SwiftPM experience, I would encourage you to learn more about it.
Step 3: Develop your Lambda
Next open your main.swift and create your function. As mentioned earlier, in this example we just want to square numbers although your function can do whatever you want.
import AWSLambdaRuntime

struct Input: Codable {
  let number: Double
}

struct Output: Codable {
  let result: Double
}

Lambda.run { (context, input: Input, callback: @escaping (Result<Output, Error>) -> Void) in
  callback(.success(Output(result: input.number * input.number)))
}
First we define an Input and Output struct, that both conform to Codable. This way we ensure that our Lambda accepts json input and creates json output. The Lambda.run { } function will start the Lambda Runtime and execute your given callback for every invocation.
⚠️ NOTE: You must specifiy your
inputandoutputtype explicitly, because the Lambda.run method is overloaded. If you see anUnable to infer closure type in the current contextcompile error, you’ve forgotten to specify yourinputtype.
Step 4: Test your Lambda locally
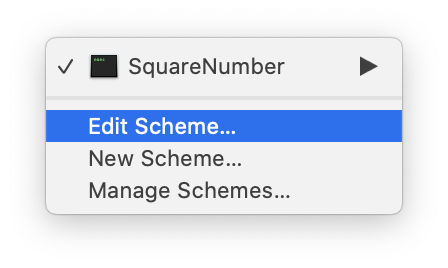
Before we deploy our Lambda to AWS, we want to ensure that it works locally. In Xcode open the Edit Scheme Menu for your target.
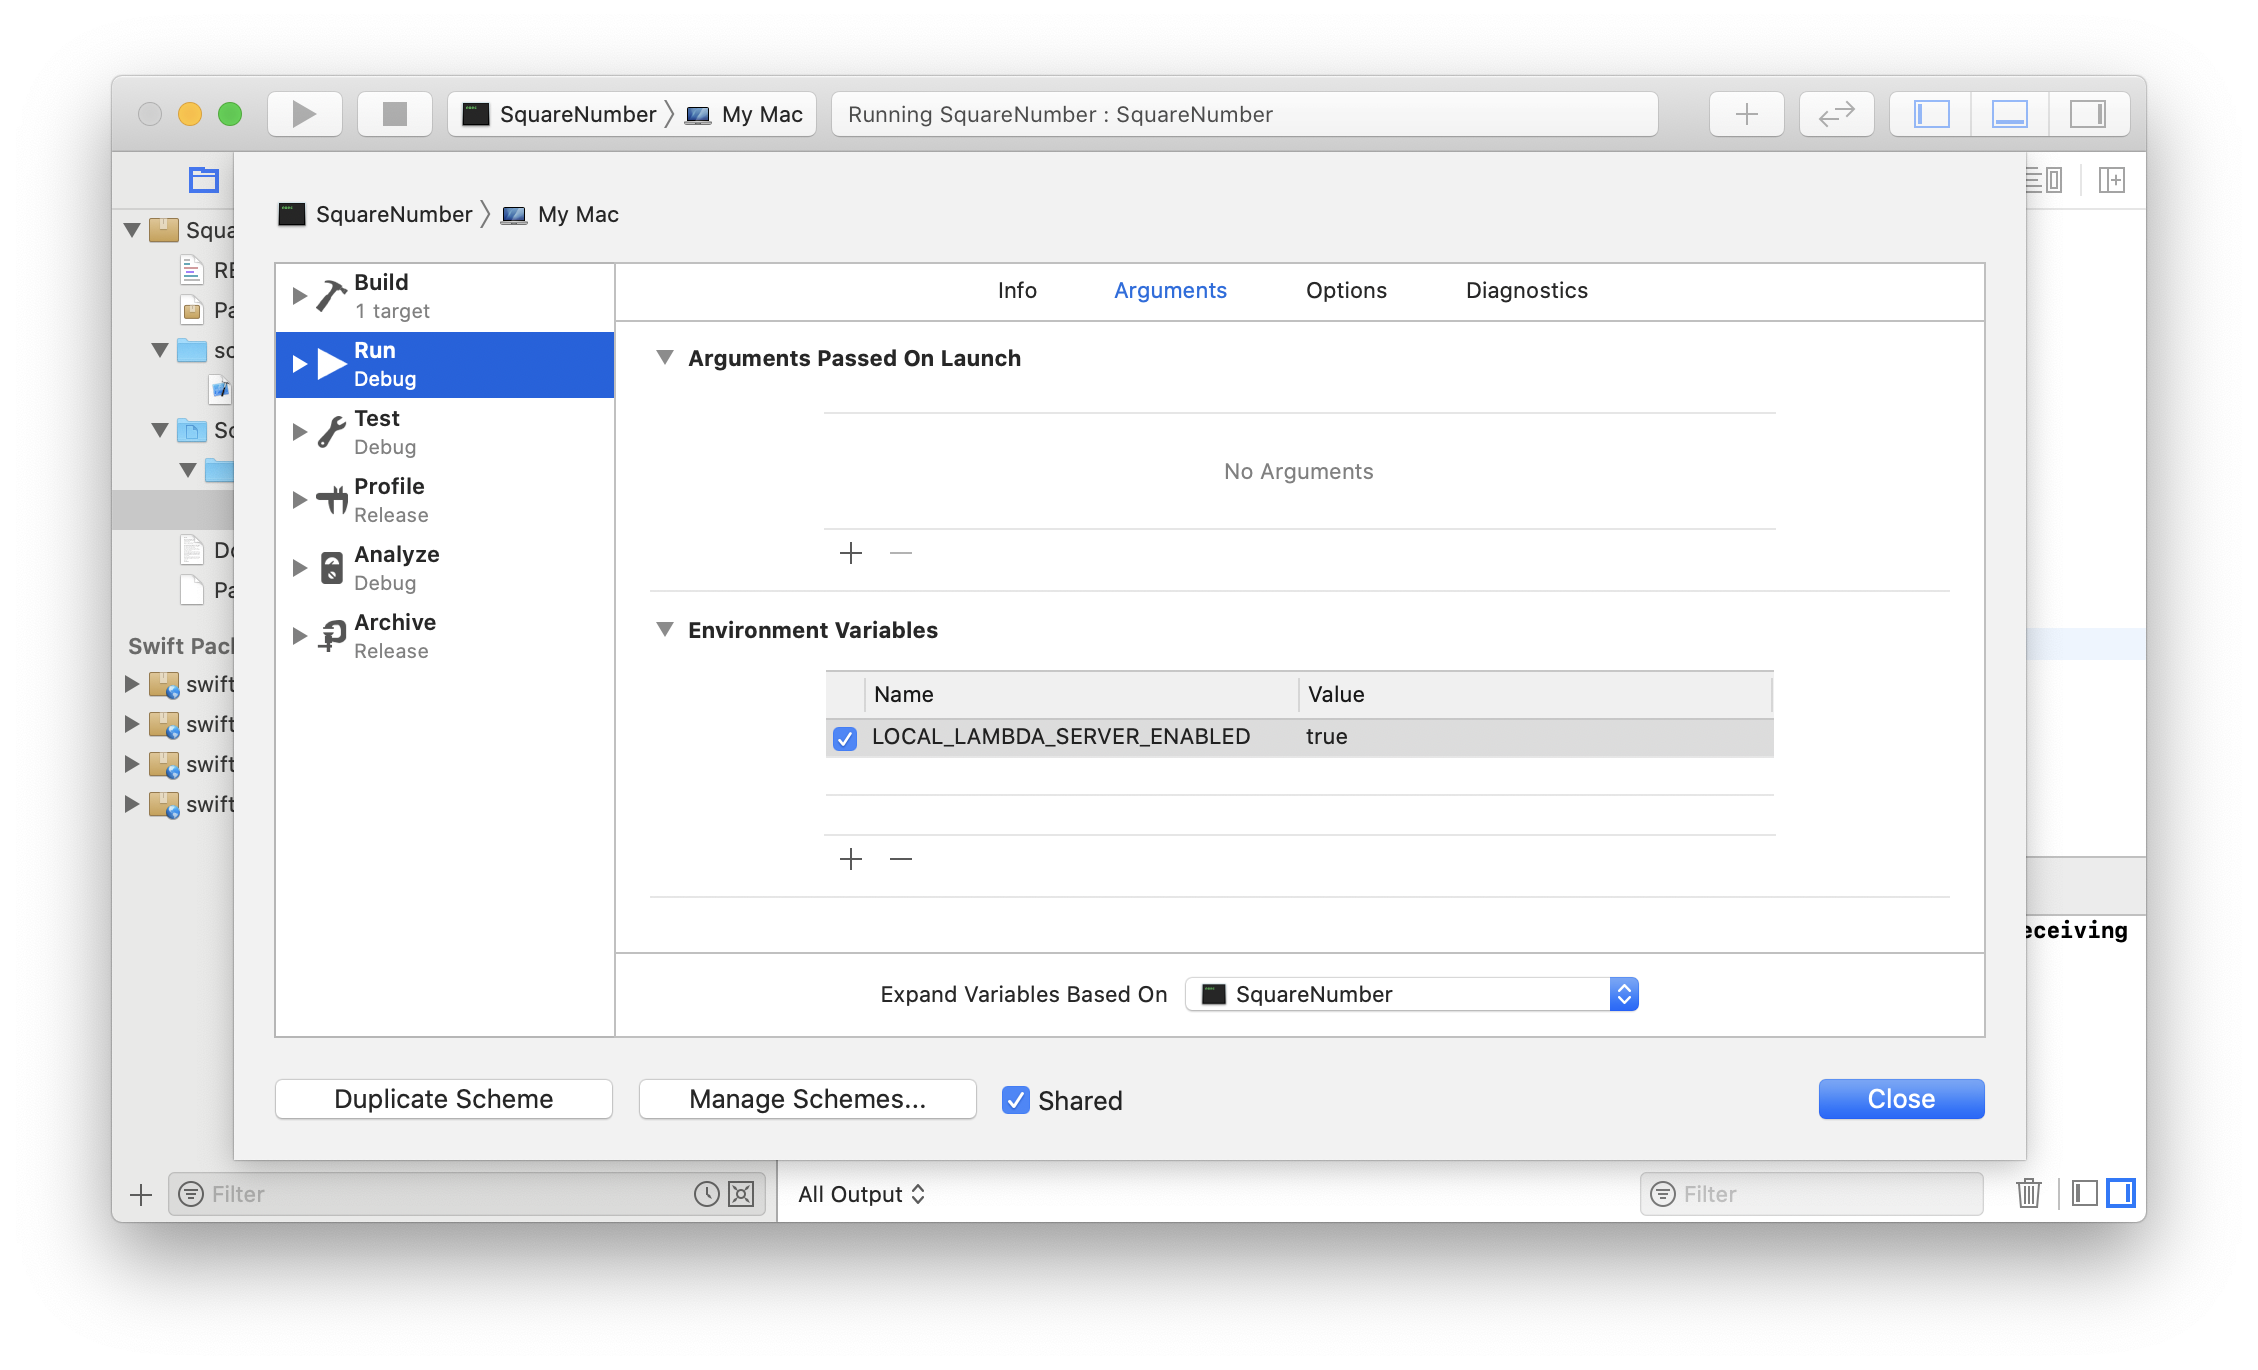
And add the environment variable LOCAL_LAMBDA_SERVER_ENABLED=true to your Run settings.
Now you can compile and run your Lambda with Xcode. You should see an output like this in your console:
2020-05-31T13:01:14+0200 info: LocalLambdaServer started and listening on 127.0.0.1:7000, receiving payloads on /invoke
2020-05-31T13:01:14+0200 info: lambda lifecycle starting with Configuration
  General(logLevel: info))
  Lifecycle(id: 73023677192036, maxTimes: 0, stopSignal: TERM)
  RuntimeEngine(ip: 127.0.0.1, port: 7000, keepAlive: true, requestTimeout: nil
You can now invoke your Lambda from your terminal with curl:
$ curl --header "Content-Type: application/json" \
  --request POST \
  --data '{"number": 3}' \
  http://localhost:7000/invoke
If you get the response,
{"result": 9}
… it looks as if everything worked fine.

Step 5: Build your Code for the AWS Lambda Environment
Your Lambda will be executed on the Amazon Linux 2 operating system. This is why we need to compile our code for this environment. To achieve this, we use Docker.
Run the following command in the root folder of your project.
$ docker run \
    --rm \
    --volume "$(pwd)/:/src" \
    --workdir "/src/" \
    swift:5.3.1-amazonlinux2 \
    swift build --product SquareNumber -c release -Xswiftc -static-stdlib
Now you should have a SquareNumber executable in your .build/release folder.
If you are interested in the command line arguments, this shall be a short introduction:
docker runSpawn a new docker container--rmDelete the container after this command exits--volume "$(pwd)/:/src"Use docker volumes to make your current directory available in the container at path/src--workdirStart the container at the path/src. Thanks to the volume argument above this is where all our current directory is mounted.swift:5.3.1-amazonlinux2the docker image we want to use. To check if a newer Swift version is available, check out the Swift docker images on DockerHub.swift build --product SquareNumber -c release -Xswiftc -static-stdlibSwiftPM command to compile our Lambda-c releaseensures that our Lambda is compiled in release mode-Xswiftc -static-stdlibensures that all Swift runtime libraries are statically linked into the executable binary
Next we need to package our lambda for deployment on AWS Lambda.
Step 6: Packing your Executable for Deployment
Our Lambda executable must be packaged with a certain folder structure to be invoked by AWS. This is why in the last step, we will copy our executable, create a symlink called bootstrap, zip the folder and upload it to AWS.
I recommend you use a script for this task. Create a folder scripts in the root of your project and create a file package.sh within. Copy the following content into the file:
#!/bin/bash

set -eu

executable=$1

target=.build/lambda/$executable
rm -rf "$target"
mkdir -p "$target"
cp ".build/release/$executable" "$target/"
cd "$target"
ln -s "$executable" "bootstrap"
zip --symlinks lambda.zip *
This script is copied from the swift-aws-lambda-runtime project.
So what does the script do?
- First we take the first argument and assign it to executable. In our case this will be
SquareNumber. - Next an empty folder is created at
.build/lambda/SquareNumber. - We copy the executable
SquareNumberinto our newly created folder. - We create a symlink
bootstrapthat links our executable. This is needed since the Lambda execution looks for an executable called bootstrap on startup. With the symlink we ensure our executable is found. - We zip the folder and name the result
lambda.zip
You can run this script in the macOS environment:
$ scripts/package.sh SquareNumber
Since the .build folder is a hidden folder you won’t be able to see the result immediately. In Finder use the keyboard shortcut Cmd + Shift + . to show hidden files. You can now navigate to .build/lambda/SquareNumber/lambda.zip. If everything went well, your lambda.zip should be around 22MB.
⚠️ Note: You might run into an permission denied error. If that’s the case you need to allow the file to be executed by running:
$ chmod +x scripts/package.sh
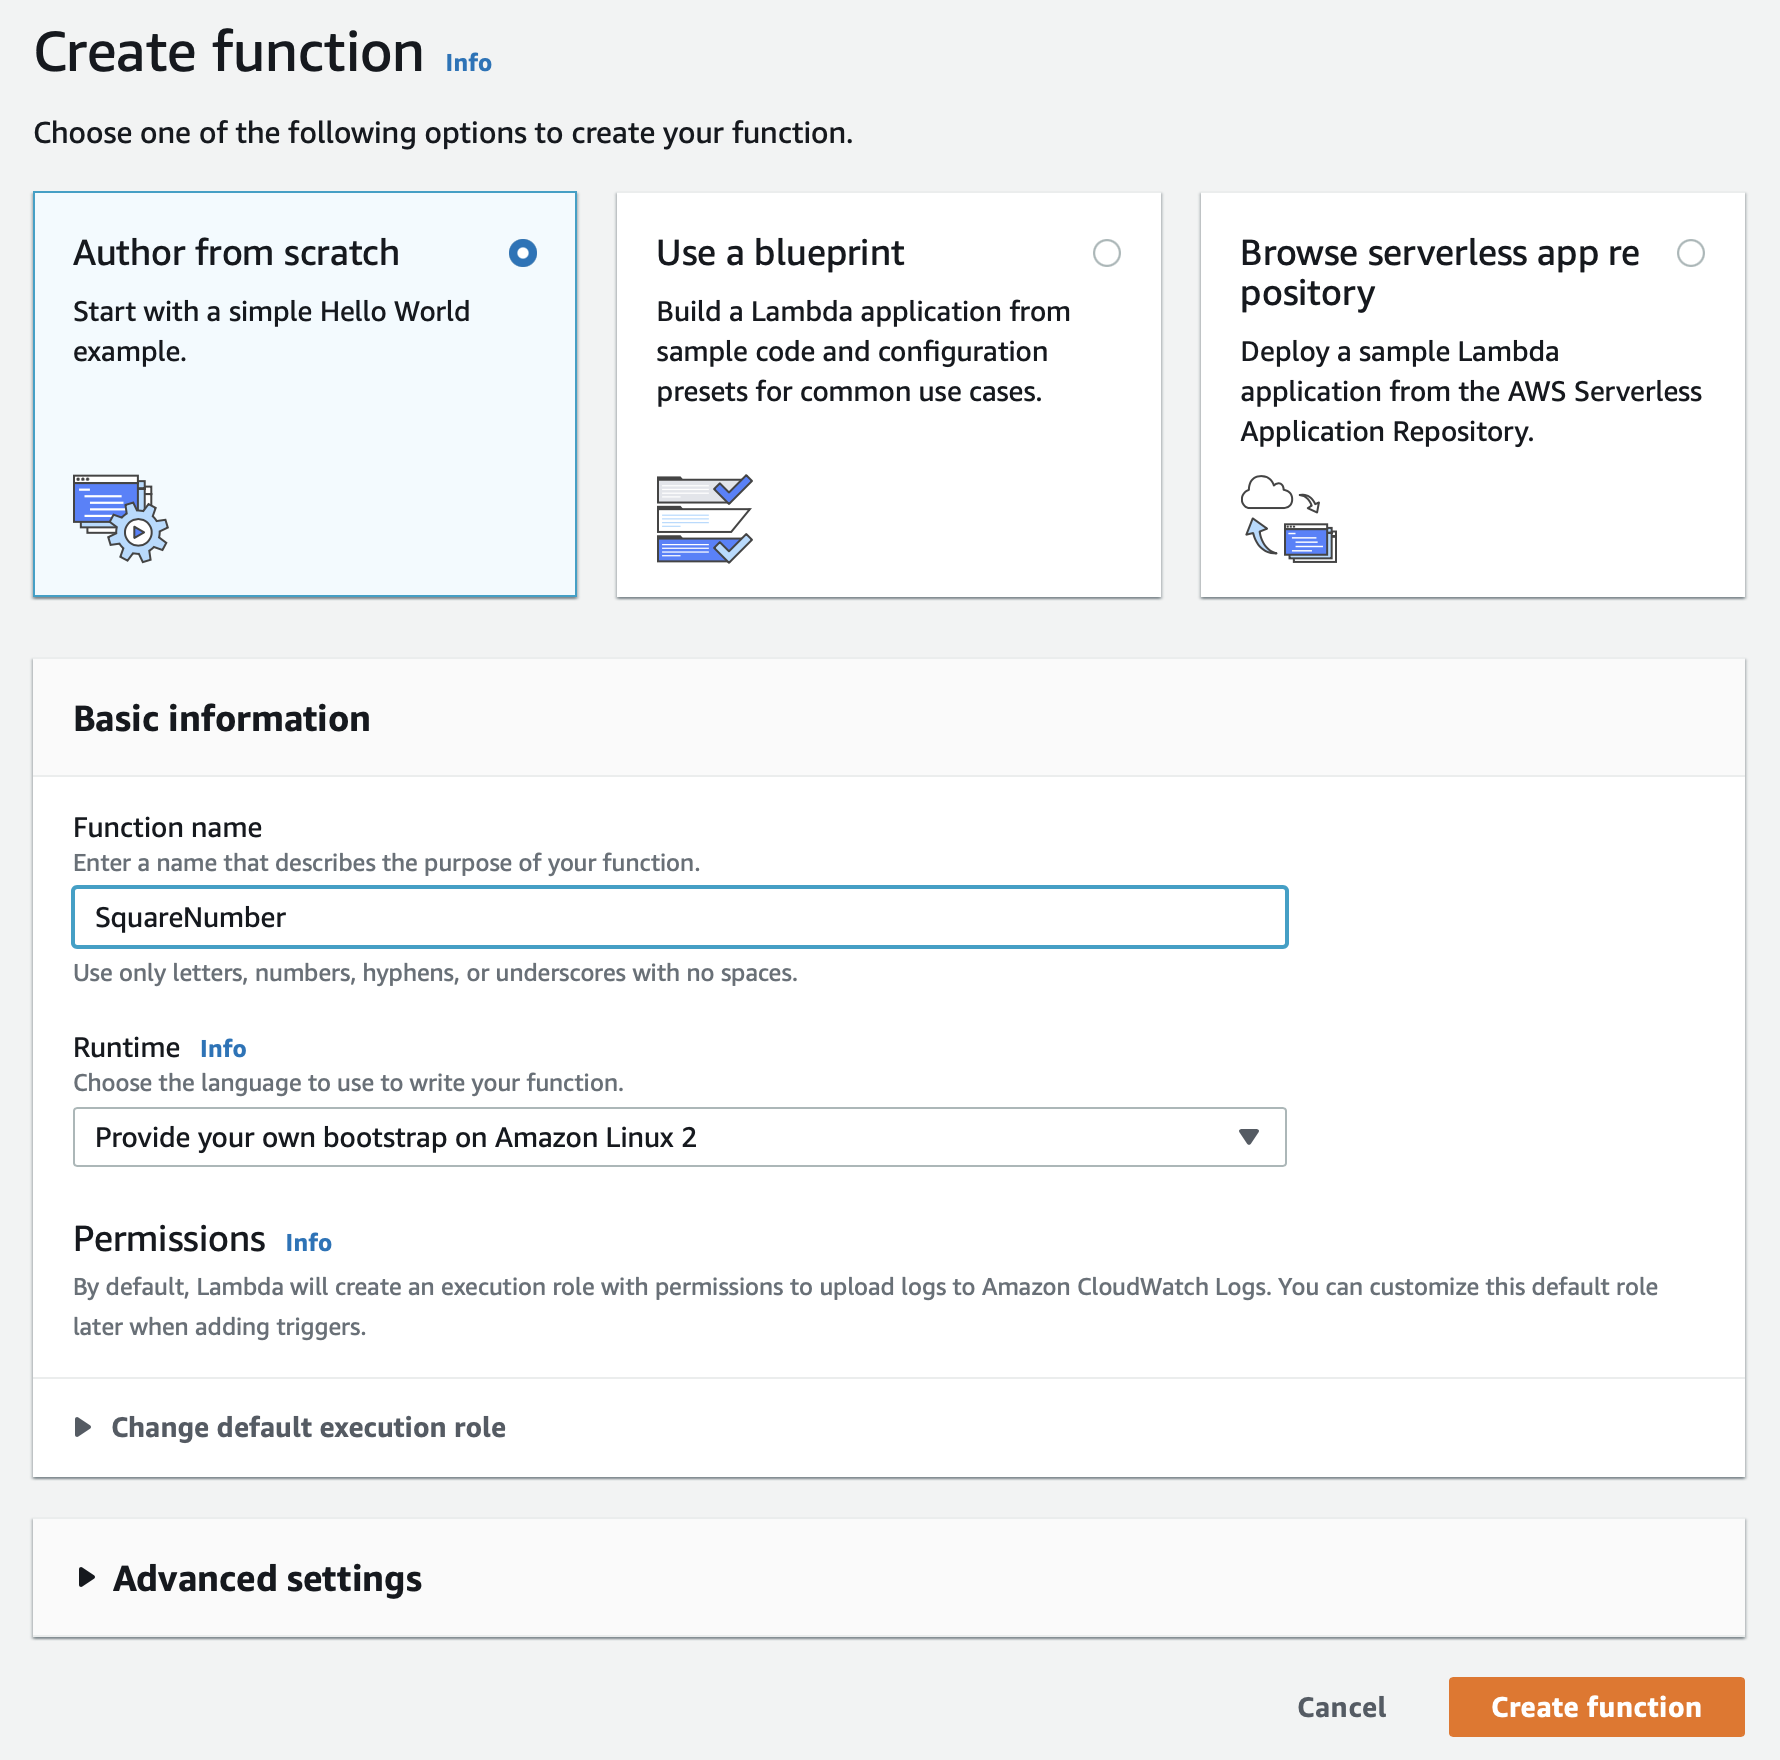
Step 7: Create your Lambda on AWS
Open your AWS Console and navigate to Lambda. Select “Functions” in the side navigation and click on “Create function” in the upper right corner. Make sure “Author from Scratch” is selected and give your function a name. I’ll choose “SquareNumber” and select the runtime “Provide your own bootstrap on Amazon Linux 2”. Leave the rest of the settings as is, and hit the “Create function” button to create your function.
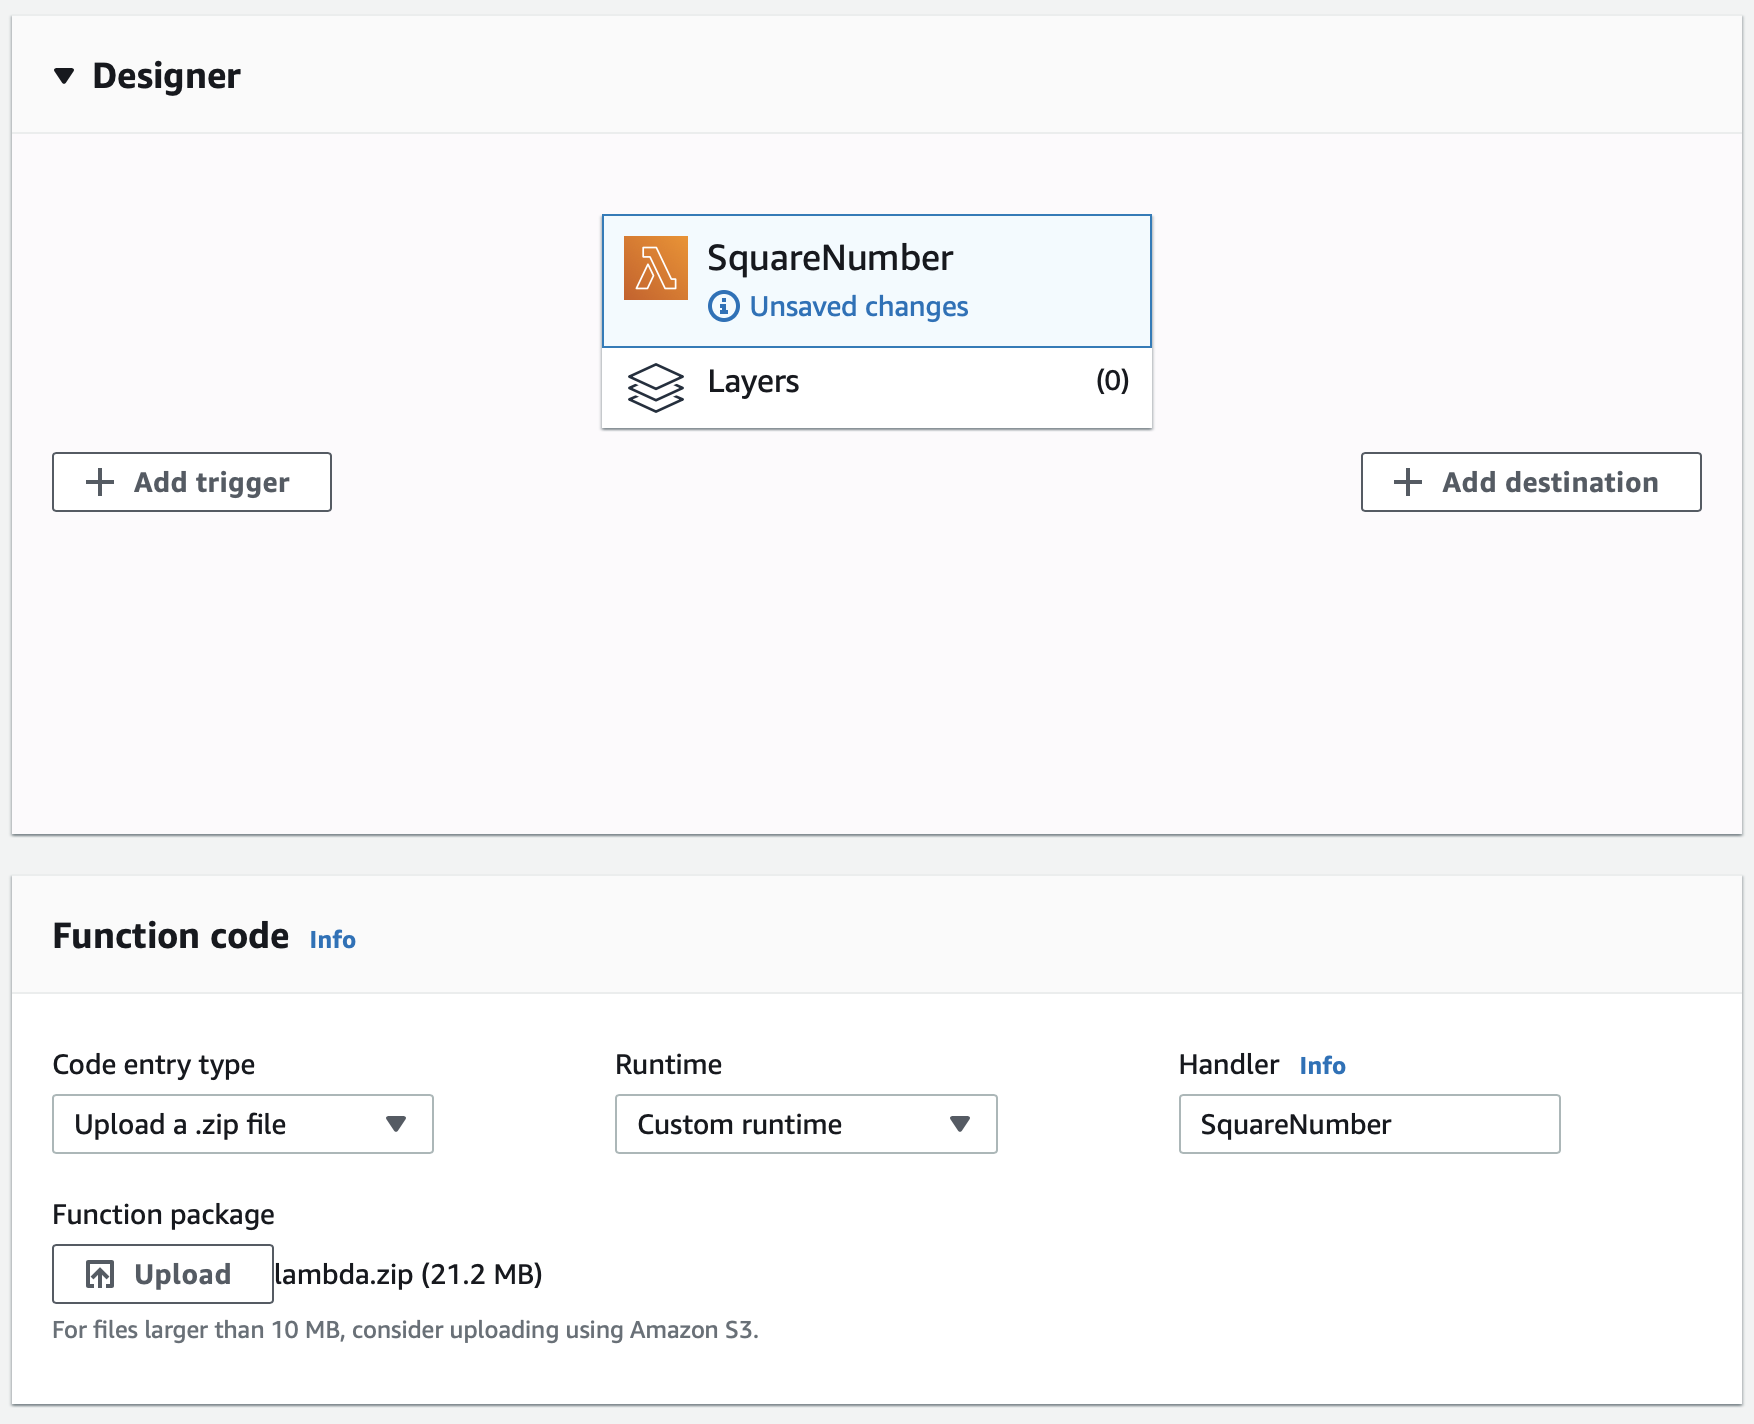
Your function has been created. Next we need to upload the lambda.zip.
You should see the section “Function Code” in the lower part of the screen. Select “Upload a zip file” in the “Code entry type”. Click on “Upload” and select your lambda.zip. In the “Handler” field you can fill in whatever you want (at least one character), since this field is not used by our runtime. Next click “Save”.
Step 8: Invoke your Lambda on AWS
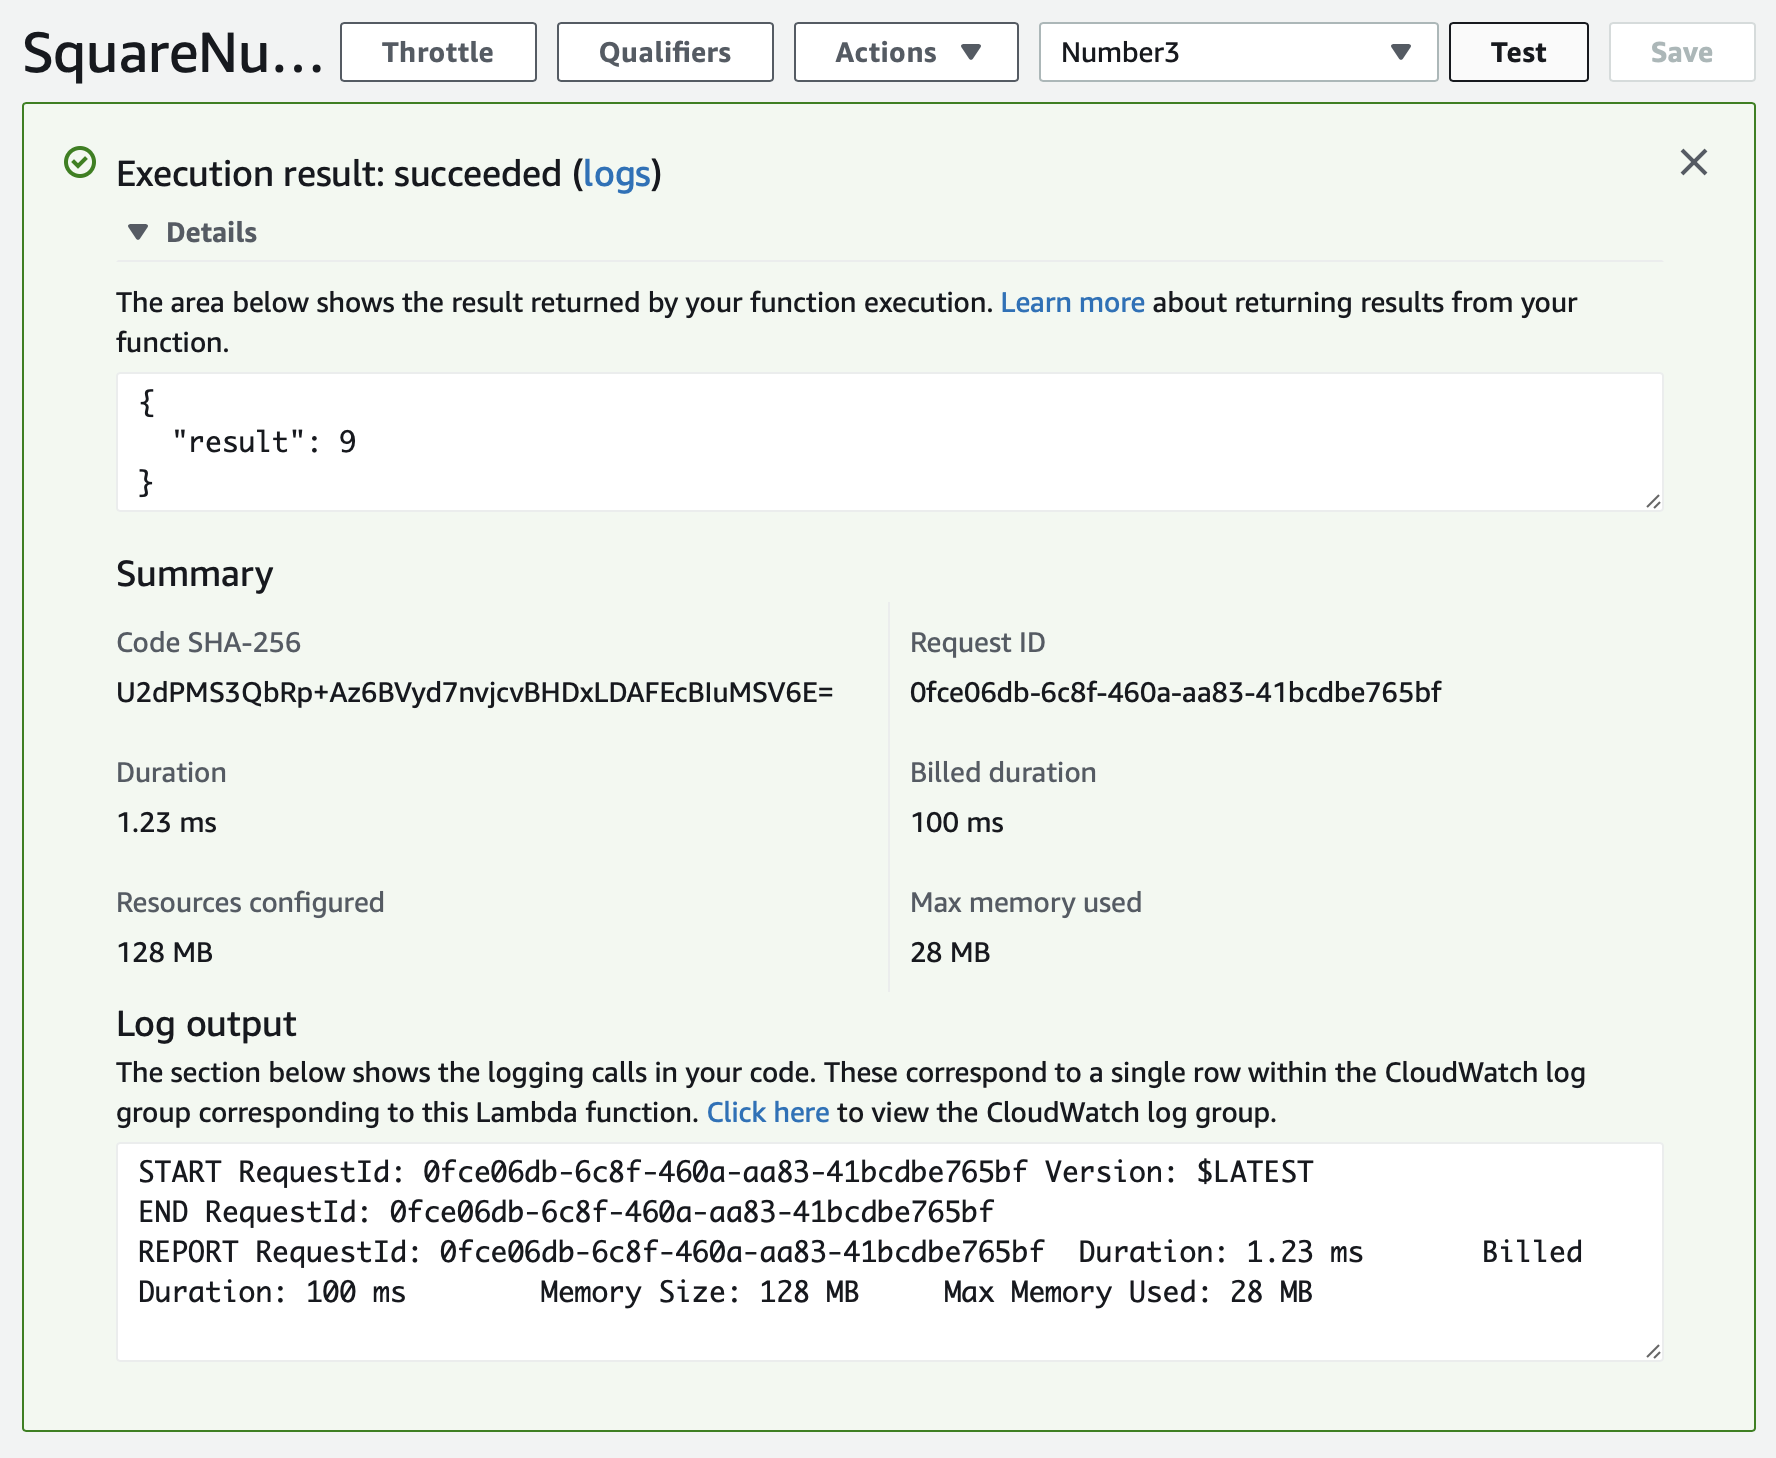
The only thing left is to invoke your lambda. Select “Test” (in the upper right corner) and change your test payload to whatever json you want to supply to your function. Since I want numbers squared mine is as follows:
{
  "number": 3
}
Since AWS wants to reuse your event for tests over and over again, you need to give your test event a name. Mine is “Number3”. Click “Save” and you can click “Test” again, and this time your lambda will be executed. If everything went well, you should see a screen like this:
Closing Notes
In this tutorial you’ve learned what is necessary to create and deploy a Lambda on AWS. If you are an iOS developer and not familiar with a number of tools used here, you shouldn’t worry too much, we all need to start somewhere. If you have open questions please reach out.
If you have enjoyed this tutorial, you can continue to learn with my follow up article Create your first HTTP endpoint with Swift on AWS Lambda, which builds on top of this one.
You can support Swift on Lambda best by just using it, Amazon is watching the usage of the Swift runtime:
And if you want to help us build up the case for more effort within Amazon for Server Side Swift, making use of projects such as this runtime are the way to give us the data to be able to justify that
— Simon (@tachyonics) May 29, 2020
If you want to learn more about Swift on Lambda, let me know on twitter, this might enourage me to write more. I’m @fabianfett. Topics for future posts could be:
- Increasing Swift Developer Productivity with aws-sam and scripts
- Using Swift’s AsyncHTTPClient and the AWS Community SDK within Lambda
- Performance considerations for Swift Lambdas
- Validating In-App-Purchase receipts with Swift on Lambda
- Integrating Vapor with the Swift AWS Lambda Runtime
Let me know what your preferences are.